


The Write to Other Table action in Clay connects data across tables, streamlining complex workflows, especially between Company and People tables.
A few example cases where you will find Write to Other Table useful:
- Parsing lists: Break down a list in a cell and map each item to another table. Ex. A list of emails.
- Column mapping: Mirroring column data from one table to another.
Setting up Write to Other Table
To set up the action, you’ll need:
- Clay API Key: Your Clay API key to create an integration.
- Source table: The parent table to copy data from.
- Destination table: The child table to send data to.
Using Write to Other Table
Use Case #1: List Mapping
Use Write to Other Table to map out lists to into rows for another table.
Each cell can contain a list of items (e.g., find contacts at company). Use Write to Other Table to map each item individually to rows in the destination table.
Step 1: Select your Clay account
If no account is selected, obtain your API key to set up a Clay integration.
Step 2: Select a table to write to
Choose a destination table, ideally within your current workbook.
Step 3: Select the column with lists
Choose the column containing cells with lists you want to map (e.g., email addresses found in each cell).
Step 4: Map list data to your new table
Select the list properties to map into your new table columns.
Step 5 (Optional): Configure run settings
Auto-update will automatically enrich new rows if they are added.
The Only run if allows you to set conditions to control when the AI runs. For example, you can make the AI run only if specific data fields are filled.
Use Case #2: Column mapping
Use Write to Other Table to copy columns from one table to another.
Copying Columns lets you transfer specific columns from one table to another, keeping data aligned and consistent. This simplifies workflows by reducing manual data entry across tables.
Tutorial
Step 1: Select your Clay account
If no account is selected, obtain your API key to set up a Clay integration.
Step 2: Select a table to write to
Choose a destination table, ideally within your current workbook.
Step 3: Omit the list by entering /
Enter “/” to skip list selection, as you won’t be mapping a list in this step.
Step 4: Map out columns
Select the columns you want to copy from the source table and match them to the appropriate columns in the destination table.
Step 5 (Optional): Configure run settings
Auto-update will automatically enrich new rows if they are added.
The Only run if allows you to set conditions to control when the AI runs. For example, you can make the AI run only if specific data fields are filled.
Write to Other Table constraints
The Write to Other Table action has two main constraints that you might come across.
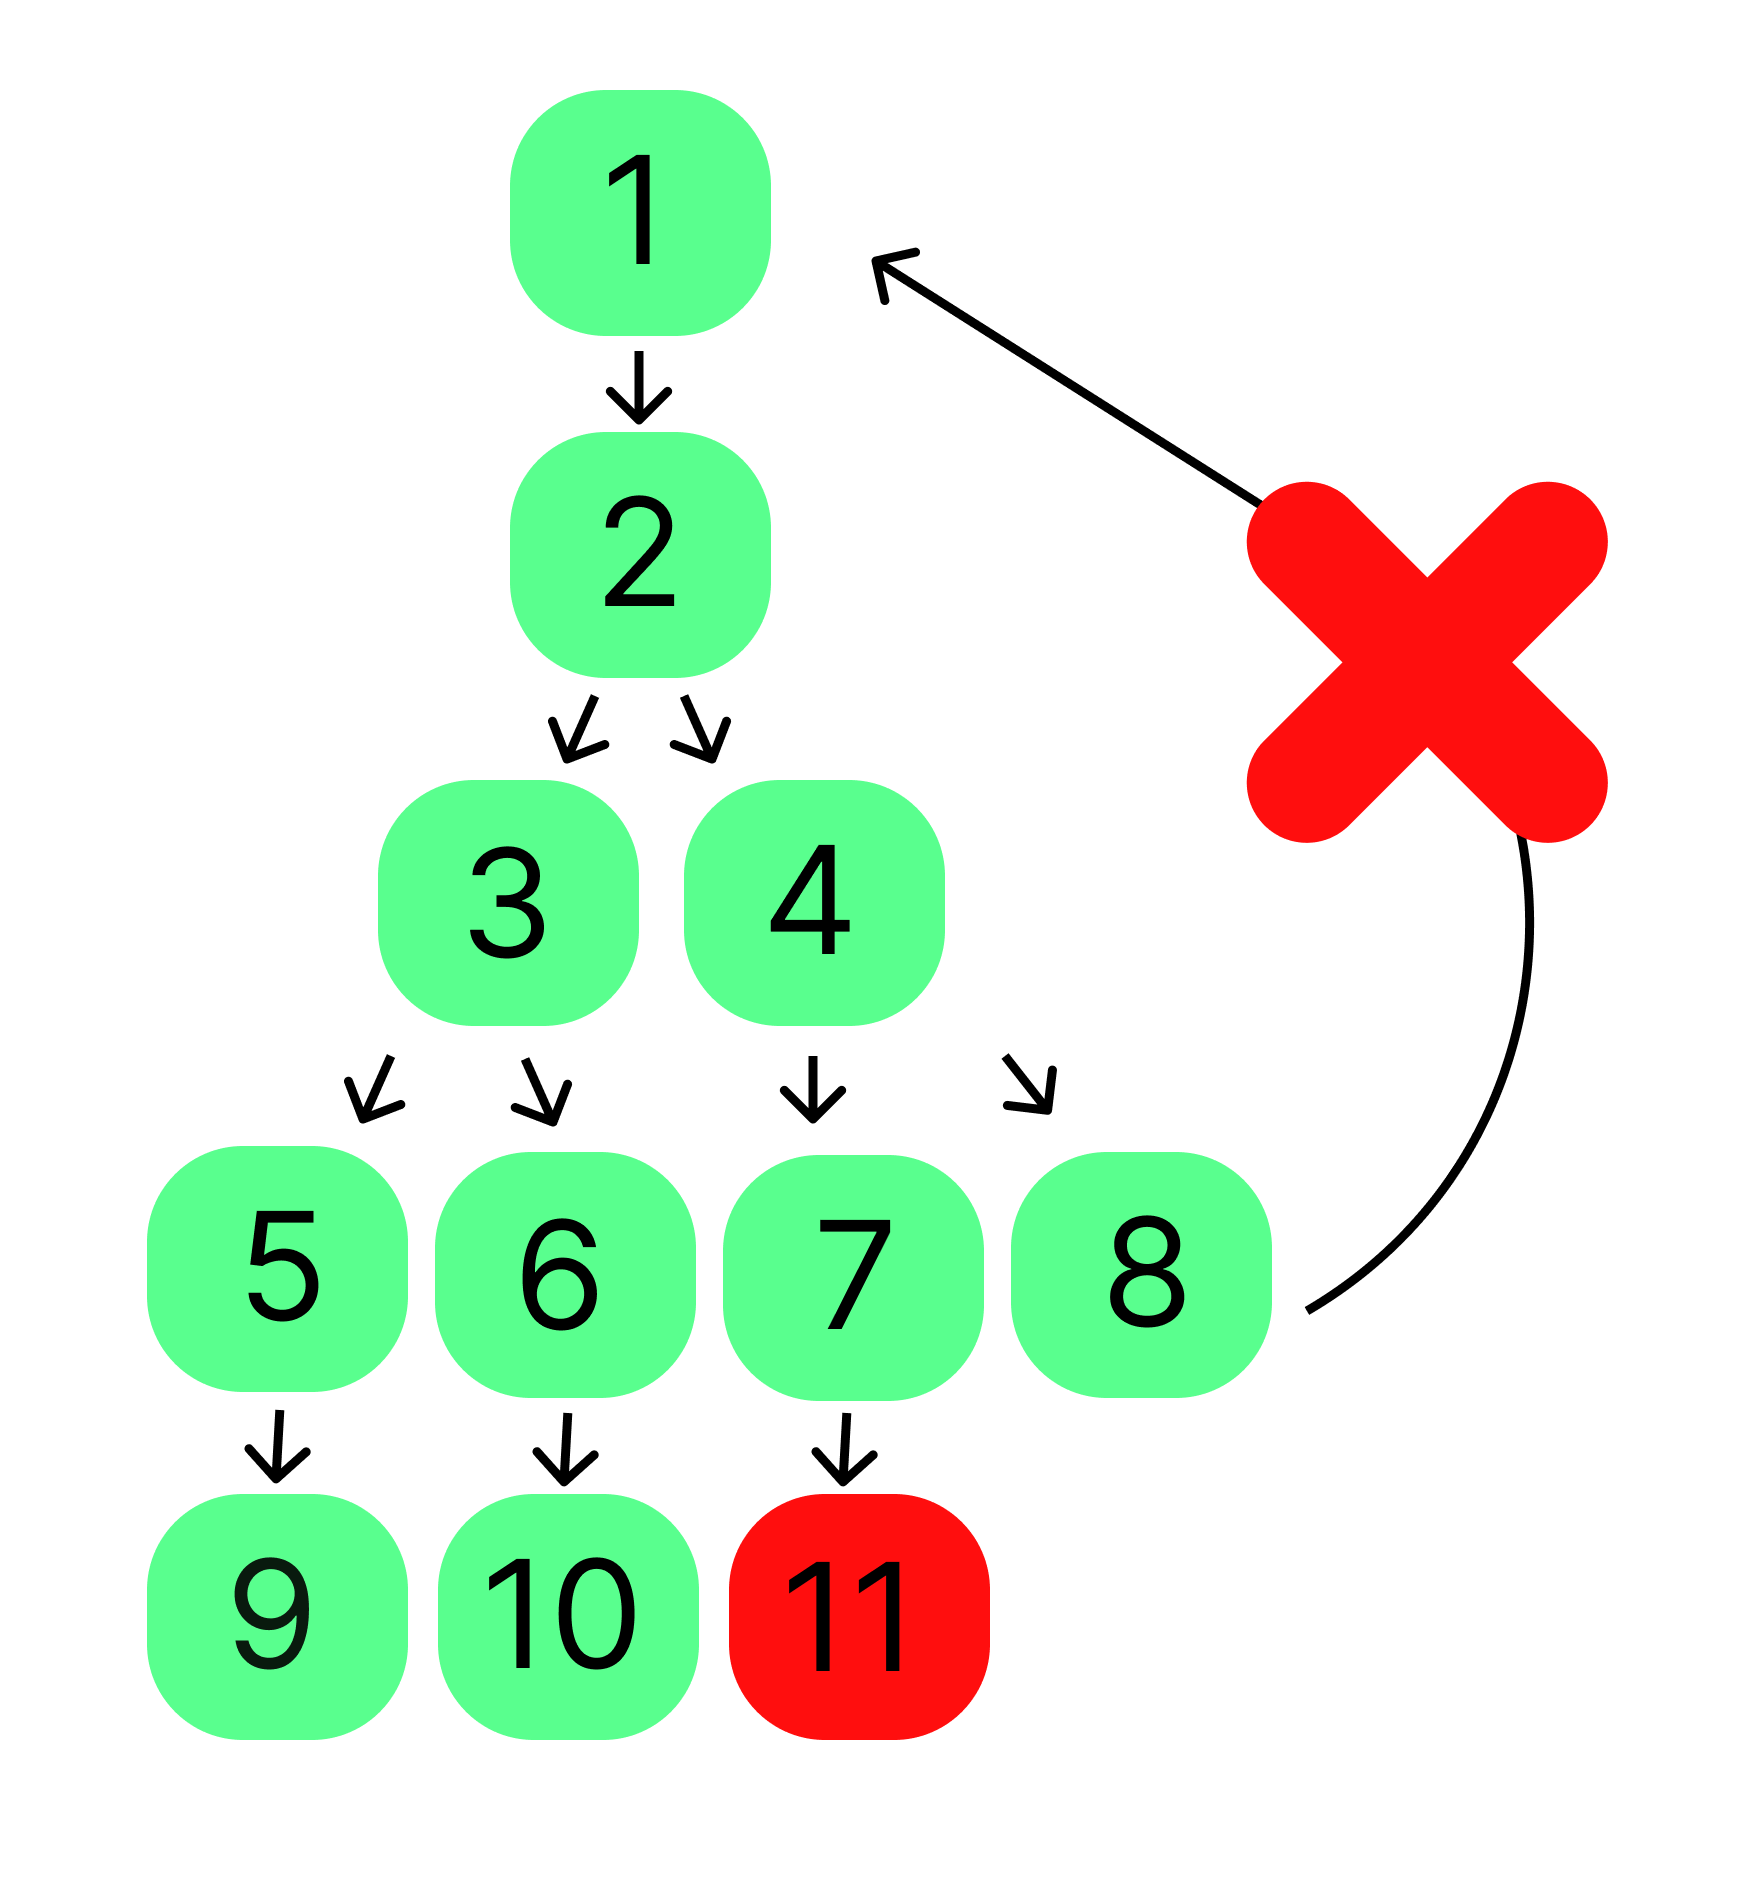
- There can be a maximum of 10 tables connected via Write to Other Table. This includes tables across workbooks.
- Data can only be sent in a linear direction (A → B → C). In other words, loops are not possible (A → B → A).
- If you want to go the other direction, you can reference data from any table (B→ A) using one of these other actions:
Lookup Multiple Rows in Other TableLookup Single Row in Other Table
- If you want to go the other direction, you can reference data from any table (B→ A) using one of these other actions:
FAQ
I received an “Invalid credentials” error, what can I do?
This error generally means your API key is incorrect or missing. To Fix:
- Copy your API key. Refer to this guide for instructions: Find Your Clay API Key.
- Add the API key to your integration account in Clay under the Integrations section.
- Save your changes and retry the action.
Why am I seeing the error “You cannot write to the selected table because the sequence of Write to Other Table integrations is misconfigured”?
This error occurs when there’s invalid or conflicting data, such as:
- Writing to a deleted column.
- Sending data to a table that references another table.
To Fix:
- Reconfigure your Write to Other Table integrations.
- Double-check that all columns and tables exist and are correctly set up.
- Add the integrations again to ensure no misconfigurations remain.
How do I send comma separated data within a cell to a new column?
If you have data in a comma-separated list and want to send it to a new column or table, follow these steps:
- Use Extract Data From Values to process the CSV data.
- Add the correct column using the Forward Slash (/) command.
- Apply a custom extraction Regex:
[^,"]+"?[^,"]+
This will split the values into a list.
Once complete, you can send the newly created list to the desired column or table.
Can I write individual values to another table, or does it have to be a list?
Lists are optional. You can write individual values or entire lists depending on your column setup.
Explore other docs
Other popular resources
Join a cohort, learn Clay fast!
The faster way to master Clay. Sign in if you're enrolled in a cohort (current or past) or apply!
Hire GTME Talent
Find and connect with GTM talent who've demonstrated expertise in building advanced workflows